
Stop treating your kitchen like a construction site and start treating it like a laboratory of patience. We are moving away from the frantic, sweat-inducing labor of traditional kneading and into the realm of passive molecular restructuring. The No Knead Pizza Dough protocol is not a shortcut for the lazy; it is a sophisticated exploitation of time as a mechanical force. While you sleep, the enzymes in your flour are performing a silent symphony of proteolysis and hydration. They are untangling tightly wound proteins and re-weaving them into a shimmering, elastic web of gluten without you lifting a single finger. Imagine a crust that shatters like glass upon the first bite, revealing a crumb so airy and viscous it feels like biting into a cloud of fermented wheat. This is the infrastructure of time. We are trading physical exertion for chronological precision. By the time you wake up, your bowl will contain a living, breathing organism ready to be transformed by the violent heat of an oven. It is efficient, it is elegant, and it is scientifically superior.
THE DATA MATRIX
| Metric | Specification |
|---|---|
| Prep Time | 10 Minutes |
| Execution Time | 18 to 24 Hours (Passive) |
| Yield | 4 Dough Balls (250g each) |
| Complexity (1-10) | 2 (Requires patience, not skill) |
| Estimated Cost per Serving | $0.45 |
THE GATHERS
Ingredient Protocol:
- 500g / 3.75 cups All-Purpose or "00" Flour
- 375ml / 1.5 cups Room Temperature Water (Filtered)
- 10g / 2 tsp Fine Sea Salt
- 1g / 1/4 tsp Active Dry Yeast
Section A: Ingredient Quality Audit:
If your flour smells dusty or flat, your finished product will lack the piquant complexity required for a world-class crust. Always check the protein content on your bag; you are looking for a range between 11% and 12.5%. If your yeast fails to bloom or looks like grey sand, it is likely expired. To fix a low-protein flour, you can "fortify" the mix by adding 10g of vital wheat gluten. If your tap water is heavily chlorinated, it will chemically stunt your yeast's reproductive cycle. The fix is simple: use filtered water or let your tap water sit uncovered for two hours to allow the chlorine to dissipate before mixing.
THE MASTERCLASS
Step-by-Step Execution:
1. The Dry Integration
In a large glass bowl, whisk together your flour, salt, and yeast until perfectly homogenous. Using a digital scale is non-negotiable here because volume measurements for flour are notoriously inaccurate due to settling.
Pro Tip: Salt is a yeast regulator. By mixing it thoroughly into the flour before adding water, you prevent a "salt kill" where high concentrations of sodium dehydrate the yeast cells before they can begin to aerate the dough.
2. Hydration and Initial Bonding
Pour your water into the center of the dry well. Use a sturdy silicone spatula or a bench scraper to fold the mixture until no dry pockets of flour remain. The dough will look "shaggy" and unattractive. Resist the urge to touch it with your hands.
Pro Tip: This is the beginning of autolyse. The water molecules are infiltrating the starch granules and beginning to swell. A bench scraper is the superior tool here because it allows you to clean the sides of the bowl efficiently, ensuring every gram of flour is hydrated.
3. The Long Phase Fermentation
Cover the bowl tightly with plastic wrap or a damp lint-free towel. Leave it on your counter at room temperature (68-72 degrees Fahrenheit) for 18 to 24 hours. During this window, the dough will double in size and become dotted with tiny bubbles.
Pro Tip: This is where "mechanical kneading" happens via osmosis. As the yeast produces carbon dioxide, the bubbles physically stretch the gluten strands from the inside out. It is a slow-motion massage that creates a more organized protein network than any human hand could achieve.
4. Portioning and Tensioning
Dust your work surface generously with flour. Gently tip the fermented dough out. It will be very sticky and viscous. Use your bench scraper to divide the mass into four equal pieces. Fold the edges of each piece into the center to create a taut skin.
Pro Tip: Creating surface tension is vital for the final rise. By pulling the outer layer tight, you are creating a structural "balloon" that will trap steam in the oven, leading to a massive "oven spring" and a hollow, crispy crust.
5. The Final Proof
Place your shaped dough balls onto a floured tray and cover them for another 60 to 90 minutes. They should look relaxed and slightly puffed before they hit the heat.
Pro Tip: Use this time to preheat your oven and pizza stone to their maximum settings. Professional results require a thermal shock that only a saturated heat source can provide.
Section B: Prep & Timing Fault-Lines:
The most common failure in No Knead Pizza Dough is a temperature imbalance. If your kitchen is a frigid 60 degrees, your 18-hour ferment might need to stretch to 30 hours. Conversely, in a 90-degree summer kitchen, your dough might over-ferment and turn into a puddle of acidic goo in just 10 hours. Monitor the "jiggle" of the bowl. If the dough has bubbles on top and wobbles like gelatin when shaken, it is ready. If it has collapsed back into the bowl, you have waited too long and the gluten structure has dissolved.
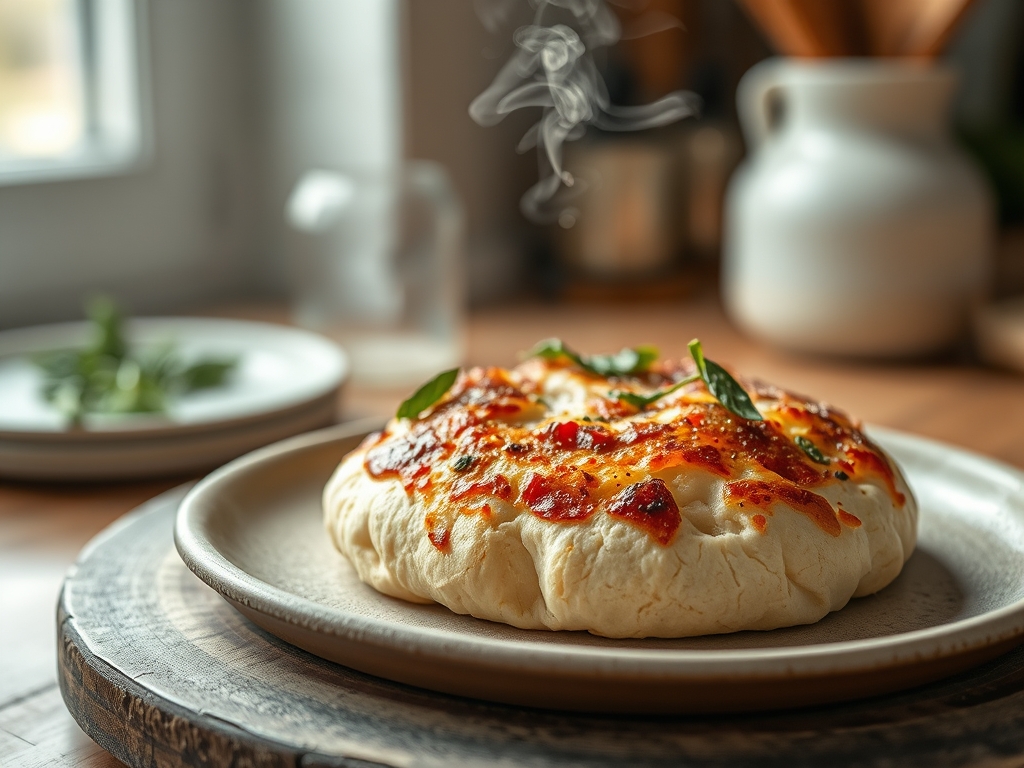
THE VISUAL SPECTRUM
Section C: Thermal & Visual Troubleshooting:
Referencing the Masterclass photo, you are looking for "leopard spotting" or char marks on the outer rim. If your crust is pale and doughy, your oven temperature was too low or your dough was too cold when it went in. If the center is soggy while the edges are burnt, you likely overloaded the pizza with high-moisture toppings like fresh buffalo mozzarella. Solution: drain your cheese on paper towels for an hour before use. If the dough refuses to stretch and keeps snapping back, it hasn't relaxed enough. Give it another 20 minutes under a towel to let the gluten bonds soften.
THE DEEP DIVE
Macro Nutrition Profile:
Each 250g dough ball contains approximately 450 calories, 12g of protein, 90g of carbohydrates, and 1g of fat. Because of the long fermentation, many of the complex sugars are pre-digested by the yeast, often making it easier for those with mild gluten sensitivities to digest compared to "quick" breads.
Dietary Swaps:
- Vegan: This recipe is inherently vegan.
- Keto: Replace flour with a mix of almond flour, vital wheat gluten, and oat fiber; however, the "no-knead" enzymatic action will not function the same way without traditional starches.
- GF: Use a high-quality 1-to-1 gluten-free flour blend containing xanthan gum. Note that the long ferment won't develop structure, so a 2-hour rest is sufficient.
Meal Prep & Reheating Science:
You can cold-ferment this dough in the refrigerator for up to 5 days to further infuse it with sourdough-like esters. To reheat leftovers, avoid the microwave; it turns the gluten into rubber. Use a dry skillet over medium heat to render the bottom crispy again, then add a teaspoon of water and cover with a lid for 30 seconds to melt the cheese with steam.
THE KITCHEN TABLE
Can I use bread flour instead?
Absolutely. Bread flour has a higher protein content, which will result in a chewier, more substantial "tug" to the crust. It is excellent for those who prefer a New York style over a delicate Neapolitan.
Why is my dough so sticky?
High hydration (75%) is the secret to big bubbles. Do not add more flour; instead, use wet hands or a well-floured bench scraper to handle the dough. The stickiness is a sign of future greatness.
What if I only have 3 hours?
Increase the yeast to 2 teaspoons and add a pinch of sugar to accelerate activity. You will lose the complex flavor profile, but you will still have a functional crust for a weeknight emergency.
Does the type of salt matter?
Yes. Avoid iodized table salt; the iodine can give the ferment a metallic "off" flavor. Stick to Kosher or fine sea salt for a clean, sharp seasoning that enhances the natural sweetness of the wheat.

