
Listen closely because the structural integrity of your evening depends entirely on the crystalline stability of your freezer shelf. We are moving beyond the soggy, cardboard discs of your youth and entering the realm of high-performance dough engineering. When you perform a comprehensive Frozen Pizza Crust Audit, you are not just checking for freezer burn; you are inspecting the molecular lattice of pre-gelatinized starches. The goal is a crust that survives the cryogenic gauntlet without losing its ability to shatter upon impact with your incisors. We want a rim that achieves maximum crumb expansion and a base that remains impervious to the moisture migration of a heavy pomodoro. This is about the physics of the par-bake. We are looking for that perfect intersection where convenience meets a professional-grade Maillard reaction. If your current crust looks like a sad, pale frisbee, your infrastructure is failing. It is time to audit your inventory and upgrade your technical security to ensure every slice delivers a structural triumph.
THE DATA MATRIX
| Metric | Specification |
|---|---|
| Prep Time | 20 Minutes |
| Execution Time | 12 Minutes |
| Yield | 4 Individual Crusts |
| Complexity (1-10) | 4 |
| Estimated Cost per Serving | $1.15 |
THE GATHERS
Ingredient Protocol:
- 500g / 3.75 cups High-Protein Bread Flour (12.5% protein minimum)
- 325ml / 1.35 cups Filtered Water (65 degrees Fahrenheit)
- 10g / 2 tsp Fine Sea Salt
- 5g / 1.5 tsp Instant Yeast
- 15ml / 1 tbsp Extra Virgin Olive Oil
- 5g / 1 tsp Diastatic Malt Powder (Optional for enhanced browning)
Section A: Ingredient Quality Audit:
If your flour lacks the necessary protein content, your dough will lack the tensile strength to hold gas bubbles during the freeze-thaw cycle. The fix is simple: add 10g of vital wheat gluten to aerate the structure and provide a sturdier framework. If your water is too hard, the minerals can toughen the gluten excessively; use filtered water to ensure a predictable fermentation rate. If your yeast is sluggish, do not risk the batch. Perform a bloom test in warm water to ensure the biological engine is firing on all cylinders before mixing.
THE MASTERCLASS
1. The Autolyse and Integration
Combine your flour, malt powder, and water in a large stainless steel bowl. Mix until no dry pockets remain and let it rest for 20 minutes. This allows the flour to fully hydrate before the mechanical work begins. After the rest, add your yeast and salt.
Pro Tip: Use a digital scale for these measurements. Volumetric baking is for amateurs; mass-based measurements ensure your hydration levels are precise to the percentage point, preventing a dough that is too viscous or too dry.
2. Mechanical Development
Turn the dough onto a clean surface and knead for 8 to 10 minutes. You are looking for the "windowpane test" where a small piece of dough can be stretched thin enough to see light through it without tearing. This indicates the gluten network is fully developed.
Pro Tip: Use a stainless steel bench scraper to keep your workspace clean and to help fold the dough over itself. This tool allows you to manipulate high-hydration doughs without adding excess flour which would ruin the protein-to-starch ratio.
3. The Bulk Fermentation
Place the dough in a lightly oiled container and allow it to double in size. This should take approximately 60 to 90 minutes depending on your ambient room temperature. The dough should feel alive and full of captured carbon dioxide.
Pro Tip: Do not rush this. Slow fermentation allows enzymes to break down complex starches into simple sugars, which will later infuse the crust with a deeper, more complex flavor profile during the par-bake.
4. Portioning and Shaping
Divide the dough into four equal rounds. Degas each portion gently and roll them into tight balls. Let them rest for another 15 minutes to relax the gluten before rolling them out into 10-inch circles.
Pro Tip: If the dough springs back while rolling, walk away for five minutes. Forcing the dough will only result in a tough, chewy texture. A relaxed dough ensures a thin, uniform base that bakes evenly.
5. The Par-Bake Protocol
Preheat your oven to 450 degrees Fahrenheit. Dock the dough with a fork to prevent massive bubbles from forming. Bake each crust for 5 to 6 minutes. You are not looking for color yet; you are setting the structure. The crust should be firm but still pale.
Pro Tip: Place the crusts on a perforated baking sheet or a preheated pizza stone. This ensures immediate heat transfer to the bottom of the crust, locking in the crumb structure before the moisture can evaporate and leave the dough flat.
6. Cryogenic Stabilization
Allow the par-baked crusts to cool completely on a wire rack. Once they reach room temperature, wrap them tightly in plastic wrap and then a layer of aluminum foil. Freeze them flat to maintain their geometry.
Pro Tip: Cooling on a wire rack is essential to prevent steam from softening the bottom of the crust. If you wrap a warm crust, you invite ice crystal formation, which will compromise the cellular integrity of the bread during reheating.
Section B: Prep & Timing Fault-Lines:
The most common failure in a Frozen Pizza Crust Audit is "Thermal Shock." If you take a crust directly from the freezer to a low-temperature oven, the center will remain gummy while the edges burn. Always preheat your oven to its maximum setting (500F+) before sliding the frozen disc inside. Another timing error is over-proofing during the bulk fermentation. If the dough collapses, the final crust will be dense and lack the airy "cornicione" that defines a high-quality pizza.
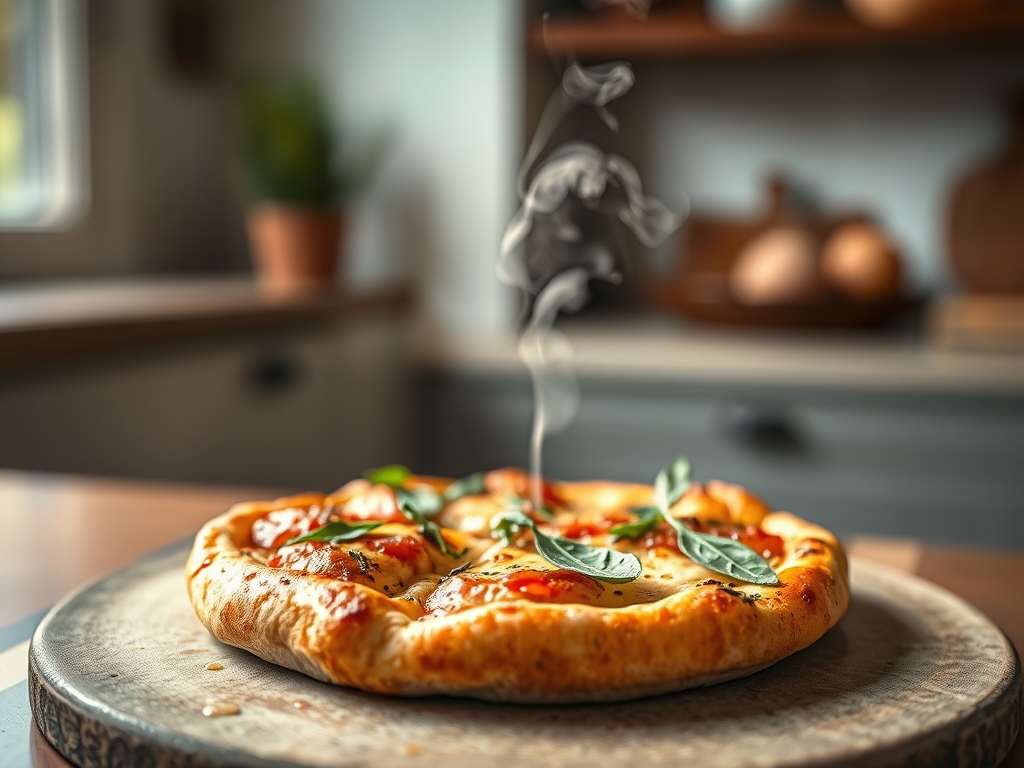
THE VISUAL SPECTRUM
Section C: Thermal & Visual Troubleshooting:
Look at the reference image above. Notice the golden-brown highlights and the slight charring on the raised bubbles. If your crust comes out of the oven looking grey or dull, you likely omitted the diastatic malt or sugar, which facilitates the Maillard reaction. If the center of your pizza is soggy while the edges are crisp, your "moisture barrier" failed; try brushing the par-baked crust with a thin layer of olive oil before freezing to render the surface hydrophobic. Uneven browning usually indicates "cold spots" in your oven; rotating the pizza 180 degrees halfway through the final bake will solve this visual inconsistency.
THE DEEP DIVE
Macro Nutrition Profile: Each crust provides approximately 350 calories, 12g of protein, 70g of carbohydrates, and 2g of fat. By controlling the ingredients, you eliminate the industrial preservatives and high-fructose corn syrup found in commercial frozen options.
Dietary Swaps: For a vegan version, this recipe is already compliant. For a gluten-free alternative, substitute the bread flour with a high-quality 1-to-1 GF blend containing xanthan gum, though be aware that the par-bake time may need to increase by 2 minutes to account for the different moisture retention of rice and potato starches.
Meal Prep & Reheating Science: To maintain the molecular structure, never thaw the crust before baking. Take it directly from the freezer, apply your toppings, and hit it with high heat. This creates a "flash-evaporation" of any surface ice, contributing to a crispier exterior while the interior remains tender.
THE KITCHEN TABLE
Why is my frozen crust always soggy?
This usually results from "moisture migration." To fix this, par-bake the crust longer until it is fully set. Also, ensure the crust is completely cool before freezing to prevent condensation from turning into ice crystals inside the packaging.
Can I use All-Purpose flour instead?
You can, but the "Frozen Pizza Crust Audit" will reveal a weaker structure. All-purpose flour has less gluten, meaning the crust will be more crumbly and less chewy. It may struggle to support heavy toppings after being frozen.
How long do these crusts stay fresh in the freezer?
When double-wrapped in plastic and foil, these crusts maintain peak quality for up to three months. Beyond that, "sublimation" occurs, where ice turns directly into gas, leaving the dough dehydrated and prone to a "stale" freezer flavor.
Do I need to dock the dough?
Absolutely. Without docking (poking small holes), the steam trapped inside the dough will create large, uneven bubbles that push your toppings off the pizza. Docking ensures a flat, stable surface for your sauce and cheese to adhere to.

