
Imagine a structural failure in the middle of a high-stakes dinner party. You have spent hours tempering ganache and infusing silken mousses; only to have the entire architectural integrity of your dessert collapse because your base was a soggy, crumbly mess. We do not accept structural instability in this kitchen. We demand a Chocolate Wafer Crust that functions as a high-tensile containment unit. This is not just a carrier for sugar; it is a dark, cocoa-rich fortress designed to provide a bitter, crunchy counterpoint to the velvet interiors of your pastry work. When the fork hits that perimeter, we want a clean, audible snap. We want a deep, mahogany hue that suggests a sophisticated Maillard reaction rather than a burnt accident. This is the infrastructure of indulgence. By mastering the ratio of saturated fats to dry cocoa solids, you are not just baking; you are engineering a sensory experience that balances the viscous nature of fillings with the rigid, piquant snap of a perfectly executed Chocolate Wafer Crust.
THE DATA MATRIX
| Metric | Specification |
|---|---|
| Prep Time | 15 Minutes |
| Execution Time | 12 Minutes |
| Yield | One 9-inch (23cm) Deep Dish Crust |
| Complexity (1-10) | 3 |
| Estimated Cost per Serving | $0.45 USD |
THE GATHERS
Ingredient Protocol:
- 250g / 2 cups Chocolate Wafer Cookie Crumbs (finely pulverized)
- 65g / 4.5 tablespoons Unsalted European-Style Butter (melted)
- 30g / 2 tablespoons Granulated Superfine Sugar
- 2g / 0.25 teaspoon Flaky Sea Salt (to brighten the cocoa profile)
- 5ml / 1 teaspoon Pure Vanilla Extract (optional, for aromatic depth)
Section A: Ingredient Quality Audit:
The primary failure point in a Chocolate Wafer Crust is often the moisture content of the crumbs. If your wafers have been exposed to humidity, they will lose their ability to aerate during the mixing process, leading to a dense, leaden base. To fix this, spread the crumbs on a sheet pan and dehydrate them in a 150F (65C) oven for ten minutes before proceeding. Furthermore, using standard butter with high water content can lead to a "steamed" crust rather than a crisp one. Always opt for European-style butter with at least 82 percent butterfat. This ensures you render the fat properly during the bake, creating a waterproof barrier that prevents the filling from migrating into the crust. If the mixture feels too dry, do not simply add water; add another teaspoon of melted butter to maintain the lipid-to-solid ratio.
THE MASTERCLASS
Step 1: Pulverization and Sifting
Place your chocolate wafers into a high-speed blender or food processor. Pulse until you achieve the consistency of fine kinetic sand. For a professional-grade finish, pass the crumbs through a medium-mesh sieve to ensure uniformity. Any large chunks will create structural weak points where the crust might fracture prematurely.
Pro Tip: Use a digital scale to measure your crumbs by weight rather than volume. Volume measurements are notoriously inaccurate due to the air pockets between crumbs, which can lead to an imbalanced fat-to-dry-matter ratio.
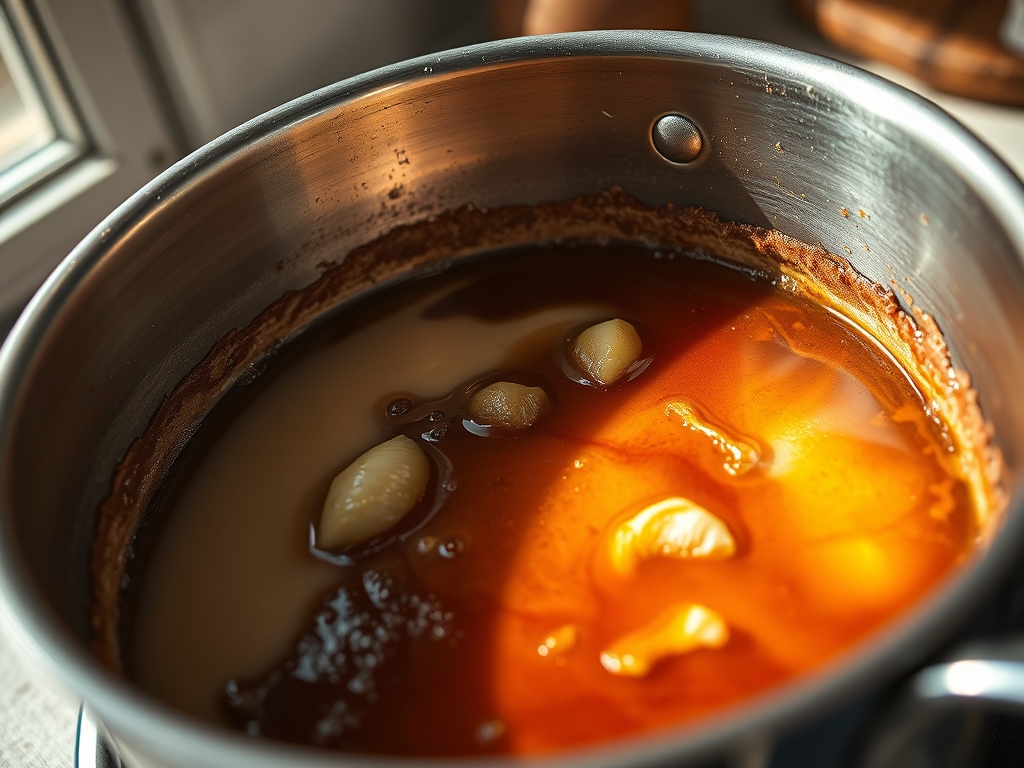
Step 2: Lipid Integration
In a small saucier, melt your butter over low heat until it is liquid but not bubbling. Pour the melted butter, sugar, and salt over the crumbs. Use a silicone spatula to fold the mixture until every crumb is evenly coated and the texture resembles wet soil. The sugar here is not just for sweetness; it acts as a thermal glue during the baking process.
Pro Tip: The science of emulsification applies here. By ensuring the butter is warm when added, you allow the fats to penetrate the porous structure of the cocoa solids, creating a more cohesive and sturdy enclosure.
Step 3: Structural Compression
Transfer the mixture to your tart pan or pie plate. Use the flat bottom of a heavy measuring cup or a professional bench scraper to press the crumbs firmly into the bottom and up the sides of the vessel. Start from the center and work outward to ensure even thickness.
Pro Tip: Pay special attention to the "corner" where the bottom meets the side. If this area is too thick, it will be difficult to cut; if it is too thin, the crust will collapse. Aim for a consistent 5mm thickness across the entire surface.
Step 4: Thermal Setting
Bake the crust in a preheated oven at 350F (175C) for 10 to 12 minutes. You are looking for the aroma of toasted chocolate and a slight firming of the surface. Remove from the oven and allow it to cool completely on a wire rack before adding any fillings.
Pro Tip: Cooling is a critical phase of the infrastructure. As the butter solidifies, it "locks" the crumbs into a rigid lattice. If you fill a warm crust, the heat from the filling will melt the structural fats, resulting in a catastrophic breach.
Section B: Prep & Timing Fault-Lines:
Timing is the silent killer of the Chocolate Wafer Crust. If you over-bake, the cocoa solids will turn bitter and acrid; if you under-bake, the sugar will not caramelize enough to bind the crumbs. Use an oven thermometer to verify your internal temperatures. Human error often occurs during the "pressing" phase. If you take too long and the butter begins to set while you are still shaping the crust, the crumbs will not bond. If the mixture becomes too cold and "clumpy" while you are working, a five-second burst in the microwave will restore the necessary plasticity.
THE VISUAL SPECTRUM
Section C: Thermal & Visual Troubleshooting:
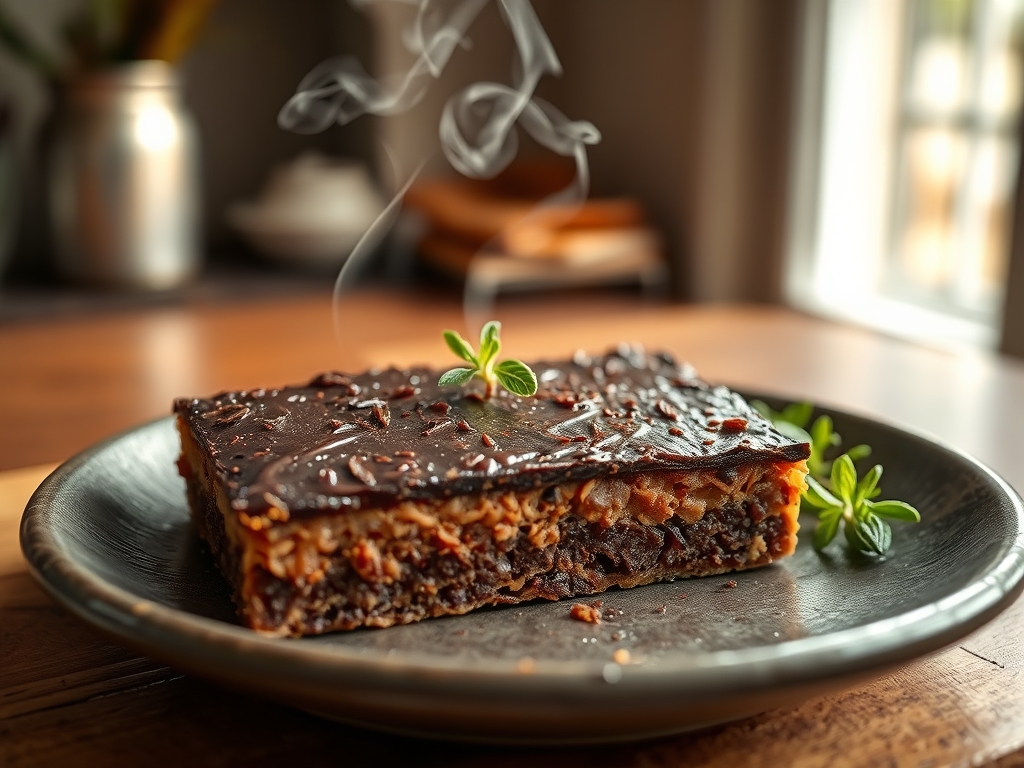
Referencing the Masterclass photo above, observe the deep, uniform matte finish of the crust. If your crust appears "blotchy" or has light-colored patches, it indicates uneven fat distribution; ensure you spend more time in the mixing phase next time. If the edges are pulled away from the pan, you likely over-baked the crust, causing excessive evaporation of the butter's water content. A "dull" or greyish cast on the crust suggests your cocoa wafers were stale or of low quality. To fix a dull appearance, you can lightly brush the finished, cooled crust with a microscopic layer of melted cocoa butter to infuse it with a professional sheen. Finally, if you see "bubbles" on the floor of the crust, you did not compress the crumbs firmly enough; use a heavier tool for the compression phase in your next iteration.
THE DEEP DIVE
Macro Nutrition Profile
Per serving (1/8th of crust):
- Calories: 185 kcal
- Fats: 11g (Saturated: 7g)
- Carbohydrates: 20g
- Proteins: 2g
- Sodium: 140mg
Dietary Swaps
- Vegan: Substitute the European-style butter with a high-quality vegan butter block or refined coconut oil. Avoid liquid oils, as they lack the saturated fat necessary to solidify at room temperature.
- Gluten-Free: Utilize gluten-free chocolate wafers. These often require 10 percent more butter as GF flours tend to be more absorbent.
- Keto: Use almond flour mixed with dark cocoa powder and erythritol, bound with melted butter or egg white for structure.
Meal Prep & Reheating Science
The molecular structure of this crust is designed for longevity. You can bake the crust up to 48 hours in advance if stored in an airtight container at room temperature. To maintain the "snap" when reheating a filled pie, use a low-temperature oven (300F) to prevent the fats from separating and making the base greasy. Avoid the microwave at all costs; it will agitate the water molecules and turn your crisp fortress into a soggy marsh.
THE KITCHEN TABLE
Can I use Oreo crumbs for this?
Yes, but you must remove the cream filling entirely. The residual moisture in the filling will compromise the structural integrity. If using pre-crushed "Oreo" style crumbs, ensure they are dry and adjust your sugar levels accordingly as they are often pre-sweetened.
Why did my crust crumble when I cut it?
This is a compression failure. You likely did not pack the crumbs tightly enough or your butter-to-crumb ratio was too low. Ensure you use a flat-bottomed tool to apply significant pressure during the molding phase to create a solid mass.
How do I prevent the filling from making it soggy?
Create a "fat barrier." After the crust has cooled, brush a thin layer of melted chocolate or cocoa butter over the interior. Once this sets, it acts as a waterproof seal that prevents the filling from soaking into the wafer infrastructure.
Can I freeze the unbaked crust?
Absolutely. You can press the crust into the pan and freeze it for up to three months. When ready to use, bake it directly from frozen, adding an extra 3 to 4 minutes to the total execution time to ensure a full set.

