
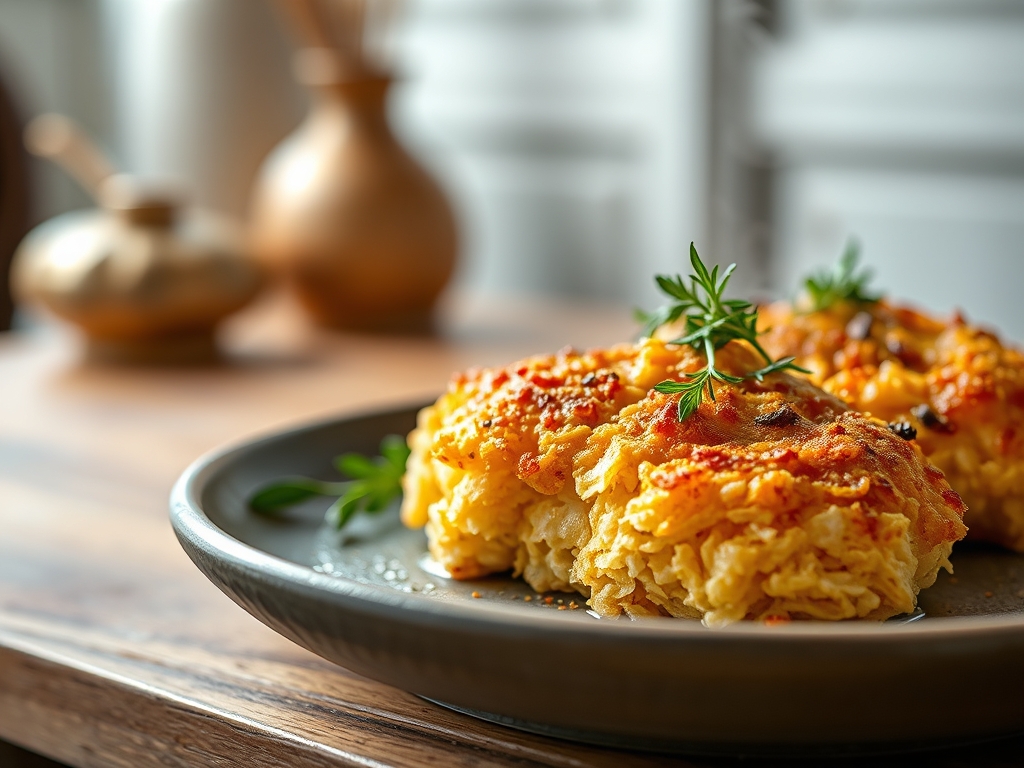
Listen to the sound of structural integrity. It is the sharp, percussive snap of a perfectly engineered Cornflake Chicken Crust as it yields to a serrated blade. We are not merely talking about dinner; we are discussing the physics of the crunch. Most home cooks treat breading like an afterthought, but we treat it like an architectural blueprint. The cornflake is the ultimate medium for this endeavor because its irregular surface area creates a chaotic topography that traps heat and moisture while providing a massive surface for the Maillard reaction. This is the gold standard of textured enclosures. When you bite through that golden, jagged exterior, you should experience a violent contrast between the brittle, toasted cereal and the succulent, tenderized protein within. We are aiming for a crust that stays rigid even under the assault of a viscous gravy or a piquant dipping sauce. Forget soggy, flour-heavy coatings that slide off the meat. Today, we audit the process, refine the mechanics, and execute a masterpiece of culinary infrastructure.
THE DATA MATRIX
| Metric | Specification |
|---|---|
| Prep Time | 20 Minutes |
| Execution Time | 15 Minutes |
| Yield | 4 Servings |
| Complexity (1-10) | 4 |
| Estimated Cost per Serving | $3.25 |
THE GATHERS
Ingredient Protocol:
- 680g / 1.5 lbs Chicken Breast or Thighs (Uniformly sliced)
- 250g / 4 cups Plain Cornflakes (Unsweetened)
- 125g / 1 cup All-Purpose Flour
- 3 Large Eggs (Room temperature)
- 30ml / 2 tbsp Whole Milk
- 10g / 2 tsp Smoked Paprika
- 5g / 1 tsp Garlic Powder
- 5g / 1 tsp Onion Powder
- 10g / 2 tsp Kosher Salt
- 5g / 1 tsp Fresh Cracked Black Pepper
- High-smoke point oil (Peanut or Grapeseed) for frying
Section A: Ingredient Quality Audit:
The most common failure point is the cereal itself. If your cornflakes have been sitting in a pantry for three months, they have likely absorbed atmospheric moisture. This creates a "leathery" texture rather than a crisp one. To fix this, spread the flakes on a sheet pan and toast them at 150C / 300F for five minutes to render out any residual humidity before crushing. Another issue is the chicken moisture content. Wet chicken is the enemy of adhesion. Always pat your protein dry with lint-free towels until the surface is tacky. If the flour is clumpy, use a fine-mesh sieve to aerate it; this ensures an even, microscopic base layer that allows the egg wash to grip the protein without creating thick, doughy pockets.
THE MASTERCLASS
1. The Mechanical Breakdown
Place your cornflakes into a heavy-duty freezer bag. Use a rolling pin or the flat side of a meat tenderizer to crush them into a coarse meal. You are looking for a variety of sizes; some dust for coverage and some larger shards for structural crunch.
Pro Tip: Use a digital scale to ensure your ratios are exact. Professional kitchens rely on weight, not volume, because the density of crushed flakes can vary wildly. This ensures every batch has the same crunch-to-meat ratio.
2. The Dredge Station Architecture
Set up three shallow bowls in a linear assembly line. Bowl one: flour mixed with half the spices. Bowl two: eggs and milk whisked until no streaks remain. Bowl three: the crushed cornflakes and the remaining spices.
Pro Tip: Use a saucier or a wide, shallow bowl for the egg wash to prevent the chicken from crowding. This keeps the liquid viscous and consistent throughout the dipping process.
3. The Adhesion Sequence
Dredge the chicken in flour, shaking off every bit of excess. Dip into the egg wash, then press firmly into the cornflakes. You must apply physical pressure to "set" the flakes into the egg matrix.
Pro Tip: Use the "dry hand, wet hand" technique to avoid breading your own fingers. This prevents cross-contamination and keeps your workspace clean, acting as your own human bench scraper to keep the station tidy.
4. Thermal Execution
Heat 2cm of oil in a heavy cast-iron skillet to 175C / 350F. Carefully lay the chicken away from you to avoid splashes. Fry for 4 to 5 minutes per side until the internal temperature hits 74C / 165F.
Pro Tip: Use an infrared thermometer to monitor oil temperature. If the oil drops below 160C, the crust will absorb fat and become greasy. If it exceeds 190C, the cereal will burn before the chicken is safe to eat.
Section B: Prep & Timing Fault-Lines:
Timing is the silent killer of the Cornflake Chicken Crust. If you bread the chicken and let it sit for twenty minutes before frying, the moisture from the meat will hydrate the flour and cereal, turning your crisp enclosure into a gummy paste. You must fry immediately after breading. Furthermore, do not overcrowd the pan. Dropping too much cold protein into the oil will cause a thermal crash. This prevents the immediate steam release required to crisp the exterior, resulting in a soggy product. Work in batches and keep finished pieces on a wire rack in a low oven to maintain their structural integrity.
THE VISUAL SPECTRUM
Section C: Thermal & Visual Troubleshooting:
Look at the reference image above. Notice the deep, golden-amber hue and the visible "peaks" of the cornflake shards. If your chicken looks pale or "blonde," your oil temperature was likely too low, or you failed to infuse the breading with enough paprika to aid in browning. If you see dark black spots, the sugar content in the cereal (even "unsweetened" brands have trace amounts) is scorching; lower the heat and flip more frequently. If the crust is falling off in large sheets, you skipped the step of shaking off the excess flour. That flour layer must be microscopic to act as a primer; otherwise, it creates a steam barrier that separates the crust from the meat.
THE DEEP DIVE
Macro Nutrition Profile:
A standard serving of this Cornflake Chicken Crust provides approximately 420 calories, 38g of protein, 32g of carbohydrates, and 16g of fat. The cornflakes provide a faster carbohydrate release than traditional breadcrumbs, making this an excellent post-workout meal when paired with a lean protein source.
Dietary Swaps:
For a Gluten-Free version, substitute all-purpose flour with white rice flour and ensure your cornflakes are certified GF (some brands use malt flavoring derived from barley). For a Keto-friendly alternative, replace the cornflakes with crushed pork rinds and use almond flour for the dredge. To go Vegan, use cauliflower florets and a "flax egg" or chickpea flour slurry as the binding agent.
Meal Prep & Reheating Science:
To maintain the molecular structure during reheating, avoid the microwave at all costs. The microwave agitates water molecules, which migrate from the chicken into the crust, causing instant sogginess. Instead, use an air fryer or toaster oven at 200C / 400F for 4 minutes. This flash-reheats the exterior and re-crisps the fats without overcooking the interior protein.
THE KITCHEN TABLE
Why is my crust falling off?
This usually happens due to excess moisture on the chicken or too much flour. Ensure the chicken is bone-dry before dredging. Shake off all excess flour until only a fine dust remains before dipping into the egg wash.
Can I bake this instead of frying?
Yes. Spray the breaded chicken liberally with oil and bake at 200C / 400F on a wire rack. The rack is essential for airflow; without it, the bottom will become soggy as the chicken juices render out.
What are the best spices for the crust?
Beyond the basics, try adding dry mustard or cayenne for a piquant kick. Smoked paprika is vital for that deep, mahogany color. Always season every layer: the flour, the egg, and the cereal.
How do I get the flakes to stick better?
Firm physical pressure is key. Don't just toss the chicken in the flakes; press it down with the palm of your hand to embed the shards into the egg wash. This creates a superior mechanical bond.

