
Listen to the sound of a structural failure that actually tastes like victory. It is the distinct, high-frequency shatter of a crust that possesses more surface area than a topographical map of the Alps. This is not your grandmother's breading. We are operating within the realm of Panko Breadcrumb Tech; a culinary architecture where the goal is maximum jaggedness and minimal oil retention. When you drop a protein coated in these elongated, needle-like shards into a shimmering vat of oil, you aren't just cooking; you are initiating a high-speed thermal exchange. The panko acts as a sacrificial heat shield, protecting the delicate proteins within while transforming into a golden, glass-like lattice. This is the infrastructure of the crunch. We are moving away from the dense, sandy textures of traditional Western crumbs and toward a light, airy matrix that defines the Japanese frying aesthetic. Prepare your workstation for a rigorous audit of texture, temperature, and technique. We are about to build something structurally sound and gastronomically superior.
THE DATA MATRIX
| Metric | Specification |
|---|---|
| Prep Time | 25 Minutes |
| Execution Time | 15 Minutes |
| Yield | 4 Servings |
| Complexity (1-10) | 4 |
| Estimated Cost per Serving | $4.50 |
THE GATHERS
Ingredient Protocol:
- 500g / 1.1 lbs Pork Loin or Chicken Breast (Center Cut)
- 150g / 2 cups High-Quality Panko Breadcrumbs (Large Flake)
- 60g / 0.5 cup All-Purpose Flour
- 2 Large Eggs (Room Temperature)
- 15ml / 1 tbsp Toasted Sesame Oil
- 5g / 1 tsp Fine Sea Salt
- 2g / 0.5 tsp Freshly Ground White Pepper
- 1 Liter / 4 cups Neutral High-Smoke Point Oil (Rice Bran or Grapeseed)
Section A: Ingredient Quality Audit:
If your panko feels soft or lacks that signature needle-like shape, your infrastructure is compromised before you even begin. Sub-par crumbs are often the result of moisture ingress or poor manufacturing. To fix this, spread the crumbs on a baking sheet and dehydrate them in a 120C / 250F oven for five minutes to restore their structural integrity. If your eggs are too viscous, they will create a thick, gummy barrier that prevents the panko from adhering properly. Whisk them with a teaspoon of water or the aforementioned sesame oil to break the protein bonds and ensure a thin, even coat. Finally, ensure your flour is sifted; clumps lead to "bald spots" where the crust will slough off in the fryer.
THE MASTERCLASS
1. Architectural Protein Leveling
Place your protein between two sheets of plastic wrap and use a meat tenderizer or the base of a heavy saucier to even out the thickness. Aim for a uniform 1.5cm thickness across the entire surface. Use your digital scale to ensure each portion is within 5 grams of the target weight for consistent cooking times.
Pro Tip: Uniform thickness is the key to simultaneous thermal completion. If one side is thicker, the thinner side will overcook and lose its moisture before the center reaches safety.
2. The Triple-Stage Adhesion Sequence
Set up three shallow trays. Tray one: Flour seasoned with salt and pepper. Tray two: Eggs whisked with sesame oil. Tray three: Panko. Use a bench scraper to move the protein efficiently through the stations. Dredge in flour, shake off every excess grain, dip in egg, and then press firmly into the panko.
Pro Tip: The "Dry Hand/Wet Hand" technique is essential here to prevent your fingers from becoming breaded. This maintains the precision of the Panko Breadcrumb Tech by ensuring the crumbs stay on the meat, not on you.
3. Thermal Calibration and Submersion
Heat your oil in a deep vessel until it reaches 175C / 350F. Use an infrared thermometer for an instant read. Gently lay the protein away from you into the oil. Do not crowd the pan; adding too many pieces at once will drop the temperature and lead to oil-logged, greasy crusts.
Pro Tip: When the protein hits the oil, the moisture inside turns to steam, creating an outward pressure that prevents oil from soaking into the crust. This is why maintaining a high, consistent temperature is non-negotiable.
4. The Resting Phase and Osmotic Equilibrium
Once the crust is a deep golden hue, remove the protein and place it on a wire cooling rack. Do not use paper towels, as they trap steam and will soften the bottom of your crust. Let it rest for three minutes before slicing.
Pro Tip: Resting allows the internal juices to redistribute. If you cut it immediately, the moisture will rush out, ruining the structural integrity of the bottom panko layer and making it soggy.
Section B: Prep & Timing Fault-Lines:
The most common human error in this workflow is "The Cold Start." If you move protein directly from a 4C / 40F refrigerator to the fryer, the exterior will burn before the interior reaches the necessary 63C / 145F. Allow your protein to temper at room temperature for 15 minutes before breading. Another fault-line is the "Dredge Delay." If you flour the meat and let it sit for too long, the flour absorbs moisture and turns into a paste, which will cause the entire crust to peel away during frying. Work in small batches to maintain the molecular bond.
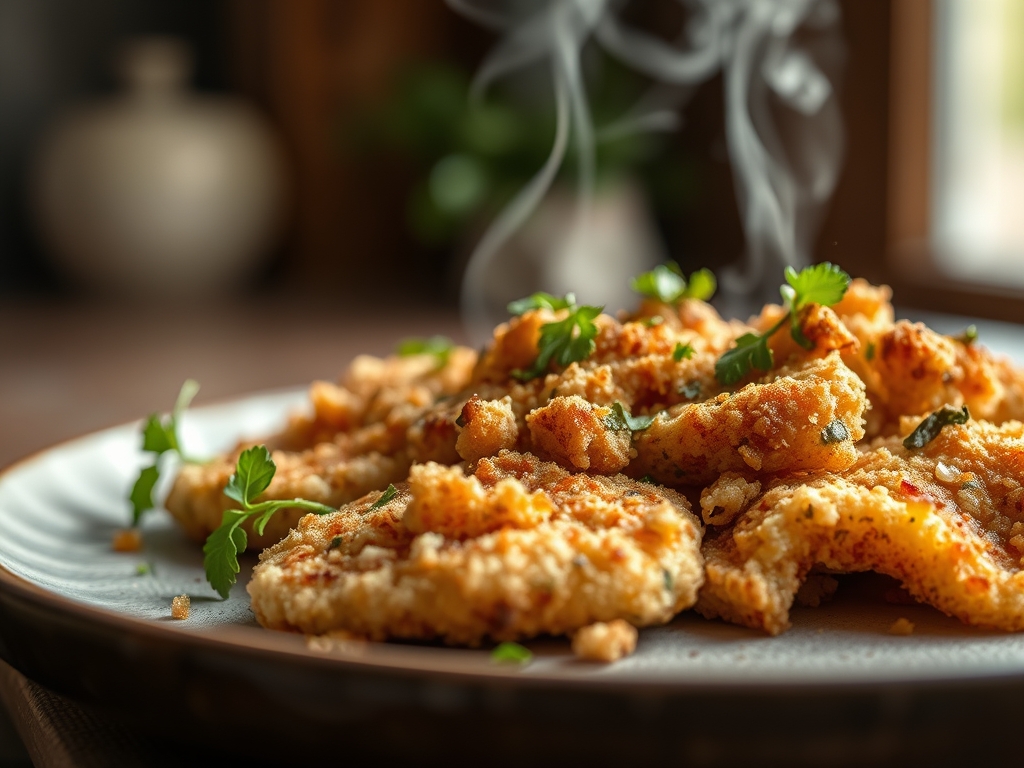
THE VISUAL SPECTRUM
Section C: Thermal & Visual Troubleshooting:
Referencing the Masterclass photo above, you are looking for a "High-Relief" texture. The crumbs should stand out like individual stalactites, not a flat, fused sheet. If your dish looks dull or pale, your oil temperature was likely too low, preventing the Maillard reaction from occurring rapidly. If you see dark brown spots and light patches, your oil level was insufficient, causing the protein to touch the bottom of the pan. The ideal visual cue is a uniform, "Gilded Age" gold. If the panko looks "hairy" or excessively spiked, congratulations; you have successfully utilized the large particle surface area to its maximum potential.
THE DEEP DIVE
Macro Nutrition Profile:
A standard serving provides approximately 450 calories, 35g of protein, 28g of carbohydrates, and 22g of fats. The high surface area of panko actually allows for less oil absorption than traditional crumbs if fried at the correct temperature.
Dietary Swaps:
- Vegan: Replace the egg wash with a slurry of flour and unsweetened soy milk. Use firm tofu or seitan as the protein.
- Keto/GF: While true Panko Breadcrumb Tech relies on wheat, you can emulate the texture using crushed pork rinds or specialized gluten-free panko made from rice flour.
Meal Prep & Reheating Science:
To maintain the molecular structure when reheating, avoid the microwave at all costs. The microwave agitates water molecules, turning them into steam which destroys the panko lattice. Instead, use an air fryer or a convection oven at 200C / 400F for four minutes. This re-crisps the fats in the crust without overcooking the interior protein.
THE KITCHEN TABLE
Why is panko better than regular breadcrumbs?
Panko is made from crustless bread that is electro-heated. This creates a sliver-like shape with a porous structure. These pores increase surface area, allowing for a crispier texture and less oil retention compared to dense, round crumbs.
Can I reuse the frying oil?
Yes, if it has not reached its smoke point. Filter the oil through a fine-mesh sieve or coffee filter to remove burnt panko particles. Store it in a cool, dark place. Use it up to three times for optimal flavor.
My breading keeps falling off. What happened?
This usually indicates the protein was too wet before the flour stage or you didn't shake off the excess flour. The flour must be a thin "primer" for the egg. If it is too thick, it creates a barrier that separates.
How do I get that piquant flavor in the crust?
To infuse more flavor, add dry mustard powder or finely grated parmesan to the panko itself. You can also render a bit of bacon fat into your frying oil to add a smoky, savory depth to the final product.

