
Listen to the sound of structural failure. That shatter, that glorious, high-frequency snap of a Flaky Pie Crust, is not an accident of the kitchen; it is a calculated victory over the physics of moisture. When you bite into a superior crust, you are experiencing the violent expansion of steam trapped within microscopic pockets of solid lipid. This is the infrastructure of the cold fat void. We are not merely baking a dessert; we are engineering a multi-layered ceramic of flour and fat that must remain structurally sound under the weight of a heavy filling while maintaining a texture that dissolves into buttery dust upon impact. To achieve this, we must treat the kitchen like a clean room. Heat is the enemy. Friction is a liability. We are looking for the precise moment where cold butter meets flour to create a laminar structure that defies the gravity of a soggy bottom. Get your digital scale ready because we are about to audit your pastry technique from the gluten bonds up.
THE DATA MATRIX
| Metric | Specification |
|---|---|
| Prep Time | 20 Minutes (plus 2 hours chilling) |
| Execution Time | 45 Minutes |
| Yield | Two 9-inch Crusts |
| Complexity | 7/10 |
| Estimated Cost per Serving | $0.45 |
THE GATHERS
Ingredient Protocol:
- 375g / 3 cups All-Purpose Flour (unbleached)
- 12g / 1 tbsp Granulated Sugar
- 6g / 1 tsp Fine Sea Salt
- 225g / 1 cup Unsalted Butter (chilled to 4 degrees Celsius)
- 120ml / 0.5 cup Ice Water
- 15ml / 1 tbsp Apple Cider Vinegar
Section A: Ingredient Quality Audit:
The primary failure point in a Flaky Pie Crust is the lipid temperature. If your butter arrives at the mixing bowl at room temperature, you have already lost the war. Warm butter coats flour particles individually, creating a "mealy" texture rather than the distinct layers required for a flake. To fix this, freeze your butter for fifteen minutes before dicing. Another common audit failure is the protein content of the flour. If you use bread flour, the high protein count will render the crust tough and leathery due to excessive gluten development. If you find your dough is too elastic, add a teaspoon of acid (vinegar or lemon juice) to help denature the proteins and ensure a tender crumb. Finally, ensure your water is truly ice-cold; use a filtered pitcher and actual ice cubes to maintain a consistent thermal baseline.
THE MASTERCLASS

Step 1: The Dry Integration
Whisk your flour, sugar, and salt in a large stainless steel bowl. Using a digital scale is non-negotiable here; volume measurements are too volatile for high-stakes pastry. Ensure the dry mix is aerated and free of clumps before introducing the fat.
Pro Tip: Use a chilled metal bowl to prevent ambient kitchen heat from migrating into your ingredients. The goal is to keep the flour at a temperature that prevents the butter from reaching its melting point during the initial incorporation.
Step 2: Lipid Fragmentation
Add your cubed, ice-cold butter to the flour. Use a bench scraper or a pastry cutter to "cut" the fat into the dry goods. You are looking for a variety of sizes; some pieces should be the size of peas, while others should be as thin as walnut halves.
Pro Tip: The bench scraper is superior to your hands because it prevents body heat from melting the butter. Those larger "shingles" of butter are what create the steam vents that lead to a Flaky Pie Crust.
Step 3: Hydration and Binding
Slowly drizzle the ice water and vinegar mixture over the flour while tossing gently with a fork. Do not pour it all at once. Stop as soon as the dough holds together when squeezed in your palm. It should look slightly shaggy and "under-mixed."
Pro Tip: The vinegar inhibits gluten formation. By using a fork to infuse the moisture, you avoid over-working the dough, which would otherwise lead to a "snappy" or tough texture.
Step 4: The Lamination Fold
Turn the shaggy mass onto a cold surface. Use your bench scraper to fold the dough over itself three or four times. This creates the "voids" where the fat sits between layers of flour. Wrap the dough tightly in plastic and refrigerate for at least two hours.
Pro Tip: This resting period allows the flour to fully hydrate and the gluten to relax. Skipping this step results in a crust that shrinks violently when it hits the oven heat.
Section B: Prep & Timing Fault-Lines:
The most common human error is the "over-knead." If you treat pie dough like bread dough, you are activating gluten bonds that will turn your crust into a rubber gasket. If you see the dough becoming shiny or greasy, your butter is melting. Stop immediately and put the entire bowl in the freezer for ten minutes. Timing is also critical during the rolling phase; if the dough sits out too long while you prep the filling, the lipid barrier collapses. Always keep the dough in the "cold zone" until the exact moment it enters the oven.
THE VISUAL SPECTRUM
Section C: Thermal & Visual Troubleshooting:
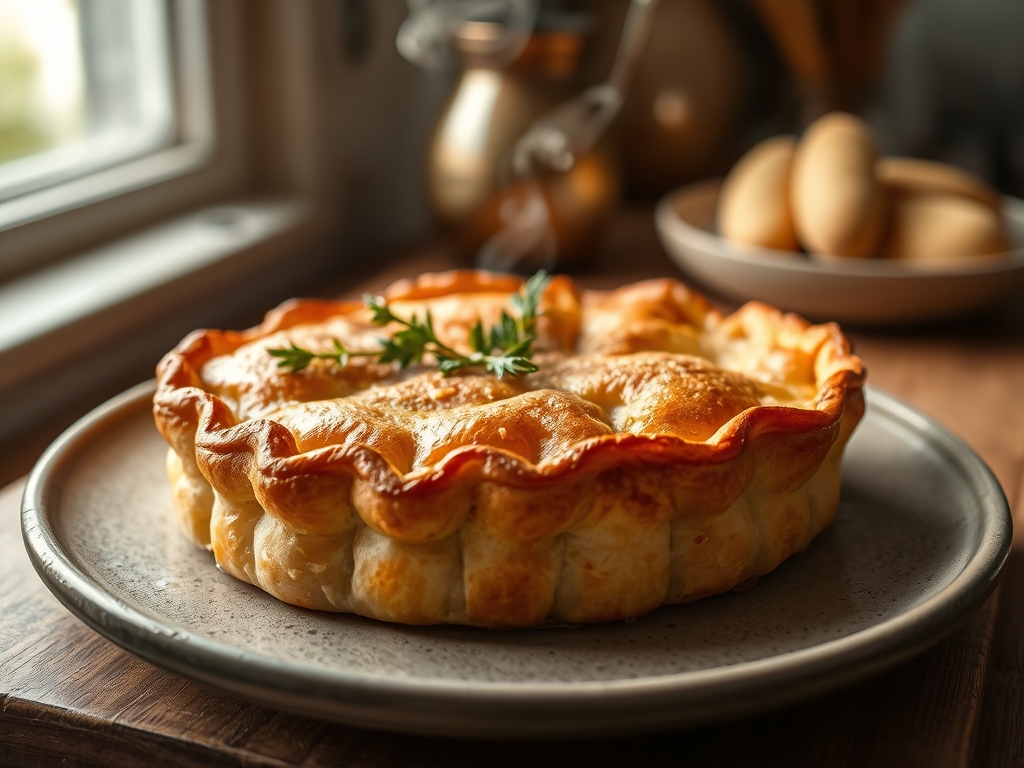
Referencing the Masterclass photo, notice the bronzed, uneven topography of the crust. This is the visual signature of a successful Flaky Pie Crust. If your crust looks pale and uniform, you likely over-mixed the butter, losing the "clumps" that create surface variation. If the edges are dark but the bottom is translucent and wet, you have a "soggy bottom" caused by insufficient bottom-heat. Use a preheated baking stone to ensure the base sets before the filling moisture can migrate into the crust. If the crust looks "dusty" or cracked, your hydration levels were too low; next time, increase the water by 5ml increments until the dough is pliable but not sticky.
THE DEEP DIVE
Macro Nutrition Profile:
A standard serving of this Flaky Pie Crust contains approximately 280 calories, 18g of fat, 26g of carbohydrates, and 3g of protein. It is a high-density energy source designed for palatability and structural integrity.
Dietary Swaps:
- Vegan: Replace butter with high-quality frozen coconut oil or a vegan butter block with at least 80% fat content.
- Keto: Substitute flour with almond flour and xanthan gum; however, the "flake" will be replaced by a shortbread-like crumble.
- GF: Use a 1-to-1 gluten-free flour blend containing rice flour and potato starch to mimic the crispness of wheat.
Meal Prep & Reheating Science:
To maintain the molecular structure, never microwave a pie. Microwaves vibrate water molecules, which turns the fat into a viscous liquid and makes the crust limp. Reheat in a 175 degree Celsius oven to re-crisp the lipid layers and aerate the internal voids.
THE KITCHEN TABLE
Why is my crust shrinking in the pan?
This is a gluten tantrum. You likely worked the dough too hard or didn't let it rest long enough. The proteins are acting like rubber bands. Let the dough chill longer to relax those bonds.
Can I use a food processor?
Yes, but use the pulse button with extreme caution. It is very easy to over-process the butter into a paste. Pulse only until you see "pea-sized" lumps, then finish the hydration by hand.
Why add vinegar to the water?
Vinegar is a gluten-inhibitor. It provides a "safety net" that keeps the crust tender even if you accidentally over-handle the dough. It also adds a very subtle piquant brightness to the flavor profile.
My butter is leaking out in the oven!
Your oven temperature is too low. The crust needs an immediate blast of high heat to set the flour structure before the butter has a chance to fully render and pool at the bottom.

