
Imagine the structural integrity of a Neapolitan canvas colliding with the lush, oily decadence of a Ligurian masterpiece. We are not merely baking; we are conducting a high-stakes audit of gluten networks and lipid distribution. The Pizza Dough Focaccia is the ultimate hybrid of culinary engineering. It demands the high-tensile strength of a long-fermented pizza base but requires the aggressive hydration and dimpled topography of traditional focaccia. When the heat hits, the surface should undergo a violent transformation. We are looking for a shatter-crisp exterior that yields to a crumb so airy it feels like biting into a cloud of olive oil. This is where the Maillard reaction meets deep-fried aesthetics. If you have ever stared at a leftover ball of dough and wondered how to maximize its potential, you are holding the blueprint. We are going to aerate this dough until it screams, infuse it with the finest fats, and bake it until the crust achieves a mahogany sheen that would make a luthier weep. Prepare for a sensory overload.
THE DATA MATRIX
| Metric | Specification |
|---|---|
| Prep Time | 20 Minutes (Active) |
| Execution Time | 24 to 72 Hours (Cold Fermentation) |
| Yield | 1 Half-Sheet Pan (12-15 Servings) |
| Complexity | 4 / 10 |
| Estimated Cost per Serving | $0.85 USD |
THE GATHERS
Ingredient Protocol:
- 500g / 3.75 cups High-Protein Bread Flour (12.5% protein minimum)
- 375ml / 1.5 cups Filtered Water (Room temperature)
- 10g / 2 tsp Fine Sea Salt
- 3g / 1 tsp Instant Yeast
- 60ml / 0.25 cup Extra Virgin Olive Oil (For the pan and topping)
- 5g / 1 tbsp Fresh Rosemary (Bruised to infuse flavor)
- Maldon Sea Salt (For the finishing crunch)
Section A: Ingredient Quality Audit:
The most common failure point in a Pizza Dough Focaccia is the use of "All-Purpose" flour with insufficient protein content. Low protein means a weak gluten matrix; your dough will collapse under the weight of the oil rather than trapping gas. If your flour is weak, add 15g of Vital Wheat Gluten to the mix to provide the necessary scaffolding. Secondly, ensure your water is filtered. Chlorine in municipal tap water can inhibit yeast activity and lead to a stunted rise. If your yeast is unresponsive, check the expiration date and perform a bloom test in 30ml of warm water with a pinch of sugar. Finally, do not use "Light" olive oil. We require the viscous nature and piquant polyphenols of a high-quality cold-pressed oil to achieve the correct flavor profile.
THE MASTERCLASS
1. The Autolyse and Initial Hydration
Combine your flour and water in a large glass bowl and mix until no dry streaks remain. Let this sit for 30 minutes. This allows the flour to fully hydrate and the gluten to begin forming autonomously. Use a digital scale for this process; volumetric measurements are the enemy of consistency in high-hydration baking.
Pro Tip: This resting period reduces total kneading time and creates a more extensible dough. It allows the enzymes to break down starches into simple sugars, which will later fuel the yeast and enhance browning.
2. Salt and Yeast Integration
Sprinkle the salt and instant yeast over the hydrated mass. Use a bench scraper to fold the dough over itself, trapping the granules inside. Perform a series of "stretch and folds" every 30 minutes for two hours. You will feel the dough transition from a shaggy mess to a smooth, elastic membrane.
Pro Tip: Salt is a fermentation regulator. By adding it after the autolyse, you ensure the yeast has a head start without the salt immediately drawing moisture out of the fungal cells.
3. The Cold Fermentation Audit
Transfer the dough to a lightly oiled container and seal it. Place it in the refrigerator for at least 24 hours. This is where the flavor is manufactured. Cold temperatures slow down yeast activity but allow lactic acid bacteria to flourish, creating complex, tangy notes.
Pro Tip: Cold fermentation alters the molecular structure of the starches, making the final crust easier to digest and significantly more flavorful than a "quick rise" dough.
4. The Pan Transition and Proof
Generously coat a heavy-duty baking sheet with olive oil. Gently tip the cold dough onto the pan. Do not force it to the corners yet. Cover and let it proof at room temperature for 2 to 4 hours. As the dough warms, it will naturally relax and fill the space.
Pro Tip: Use a heavy steel or cast iron pan. These materials have high thermal mass, ensuring the bottom of your Pizza Dough Focaccia fries in the oil rather than just steaming.
5. Dimpling and Thermal Execution
Preheat your oven to 450 degrees Fahrenheit (232 Celsius). Drizzle the top of the dough with more oil. Use your fingertips to press deep indentations into the dough, reaching all the way to the bottom of the pan. Sprinkle with rosemary and sea salt. Bake for 20 to 25 minutes.
Pro Tip: Dimpling creates "oil pools" that prevent the dough from rising uniformly, resulting in the classic craggy landscape. Use an infrared thermometer to ensure your oven stone or rack has reached the target temperature before loading.
Section B: Prep & Timing Fault-Lines:
If your dough is resisting stretching during the pan phase, it is likely too cold. Gluten is like a rubber band; when cold, it is tight and prone to snapping or shrinking. Give it more time at room temperature. Conversely, if the dough feels soupy and loses its bubbles during dimpling, it is over-proofed. To save over-proofed dough, skip the heavy dimpling and move it immediately to the hottest part of the oven to maximize "oven spring" before the structure collapses.
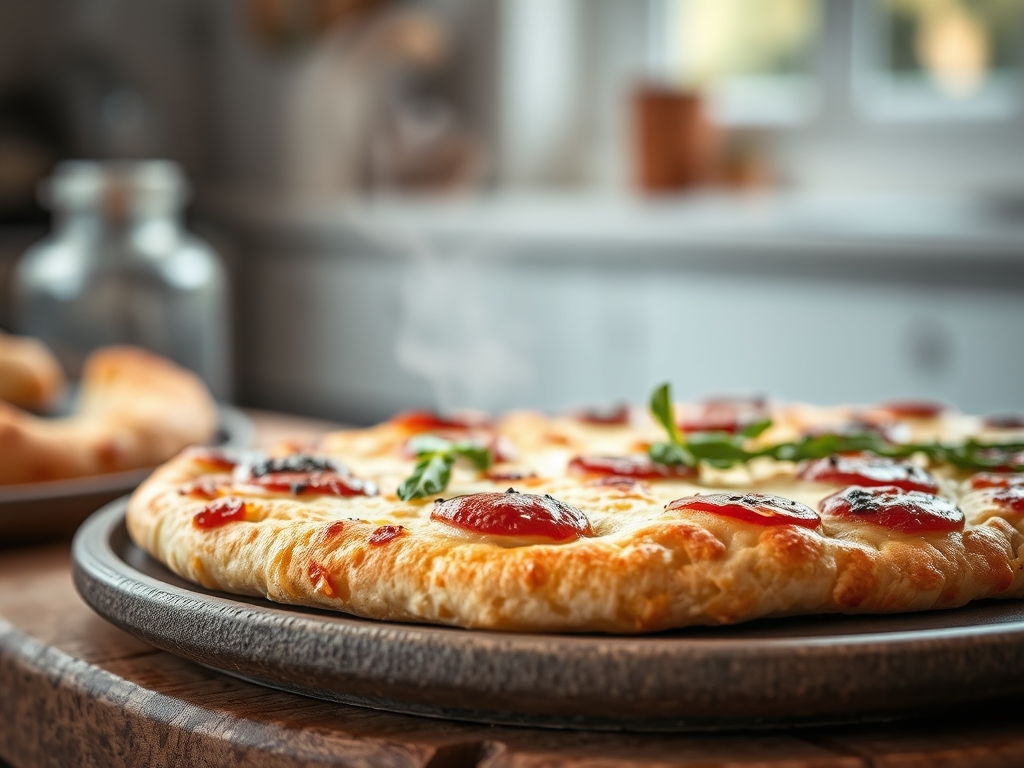
THE VISUAL SPECTRUM
Section C: Thermal & Visual Troubleshooting:
Observe the reference photo. Note the "leopard spotting" on the raised peaks; this indicates high-heat caramelization. If your crust is a uniform, pale tan, your oven temperature was too low or your dough lacked sufficient residual sugars. You can fix this by adding 5g of diastatic malt powder to your dry ingredients. If the bottom is soggy while the top is dark, move the pan to the lowest rack to increase conductive heat transfer from the oven floor. The "visual cues" of a perfect bake include a deep golden hue and visible "fried" edges where the dough met the oil and metal. If the rosemary is burnt to a crisp, try soaking the herbs in oil for ten minutes before applying them to the dough.
THE DEEP DIVE
Macro Nutrition Profile:
A standard serving (approx. 80g) contains roughly 210 calories, 5g of protein, 28g of carbohydrates, and 9g of fat. The high fat content comes primarily from monounsaturated olive oil, which is heart-healthy but calorie-dense.
Dietary Swaps:
- Vegan: Naturally vegan as written. Ensure your sugar (if used for yeast blooming) is bone-char free.
- Keto: Replace bread flour with a blend of almond flour, vital wheat gluten, and oat fiber. Note that the texture will be significantly denser.
- GF: Use a high-quality 1-to-1 gluten-free baking flour and increase the water by 10% to account for the higher absorption of rice flours.
Meal Prep & Reheating Science:
To maintain the molecular structure, never microwave focaccia. This causes the starch molecules to recrystallize into a rubbery texture. Instead, reheat in a 350-degree oven for 5 minutes. This "re-gelatinizes" the starches and restores the crispness of the lipid-soaked crust.
THE KITCHEN TABLE
Can I use store-bought pizza dough?
Yes, but you must audit its hydration. Most commercial doughs are too dry for focaccia. Add 2 tablespoons of water and 1 tablespoon of olive oil to the store-bought ball, then let it proof for 3 hours before dimpling.
Why is my focaccia crumb dense?
Density usually stems from under-proofing or "degassing" the dough too aggressively during the dimpling stage. Be gentle. You want to create craters, not deflate the entire ecosystem of gas bubbles you worked so hard to build.
How do I get the bottom extra crispy?
Place your baking sheet directly on a preheated pizza stone. This creates an immediate thermal shock, causing the oil in the pan to boil and effectively deep-fry the bottom crust of your Pizza Dough Focaccia.
Can I add toppings like cheese or tomatoes?
Absolutely. However, high-moisture toppings like fresh mozzarella or raw tomatoes can create "soggy spots." Par-cook watery vegetables or use low-moisture cheeses to maintain the structural integrity of the hybrid crust.
How long does it stay fresh?
Focaccia is best within 6 hours of baking. The high surface area leads to rapid staling. If keeping it longer, wrap it tightly in foil and freeze. Reheat directly from frozen to restore the original crumb texture.

