
Listen to the sound of a structural failure. It is the hollow, rhythmic thud of a knuckle against a blistered rim; it is the shattering of a micro-thin obsidian layer of caramelized sugars. We are not merely baking dinner; we are managing a complex biological architecture. The Sourdough Pizza Crust is the gold standard of culinary infrastructure. It requires more than a recipe; it requires an audit of gas retention and cellular integrity. When you pull that disc from the heat, the leopard spotting should look like a topographical map of a volcanic wasteland. The interior must be a cathedral of open alveolar structures, held together by a gluten lattice that has been stressed, rested, and fermented to the point of structural perfection. This is where the viscous nature of high-hydration dough meets the violent thermal energy of a stone floor. If your crust lacks the piquant tang of lactic acid or the structural rigidity to hold a payload of molten mozzarella, you have failed the inspection. Prepare to rebuild your technique from the foundation up.
THE DATA MATRIX
| Metric | Specification |
|---|---|
| Prep Time | 45 Minutes (Active) |
| Execution Time | 24 to 72 Hours (Fermentation) |
| Yield | 4 Dough Balls (280g each) |
| Complexity | 8 / 10 |
| Estimated Cost per Serving | $1.15 |
THE GATHERS
Ingredient Protocol:
- 500g / 3.8 cups High-Protein Bread Flour (12.5% protein minimum)
- 350ml / 1.5 cups Filtered Water (Room temperature)
- 100g / 0.4 cups Active Sourdough Starter (Fed 4-6 hours prior)
- 12g / 2.2 tsp Fine Sea Salt
- 10g / 0.7 tbsp Extra Virgin Olive Oil (Optional for elasticity)
Section A: Ingredient Quality Audit:
If your flour lacks the necessary protein content, the gluten network will collapse under the weight of the carbon dioxide produced by the wild yeast. This results in a dense, leaden disc rather than an aerated masterpiece. To fix this, integrate 10g of Vital Wheat Gluten to reinforce the infrastructure. If your water is heavily chlorinated, it will act as a biocide, stalling your fermentation. Always use filtered water or allow tap water to sit uncovered for 24 hours to aerate and dissipate the chemicals. Finally, if your sourdough starter is sluggish, perform a "boost feed" at a 1:1:1 ratio using whole rye flour to increase the microbial activity before integration.
THE MASTERCLASS
1. The Autolyse Phase
Combine your flour and water in a stainless steel mixing bowl until no dry clumps remain. Cover and let sit for 60 minutes. This allows the enzymes to begin breaking down starches into simple sugars without the interference of salt or yeast.
Pro Tip: Use a digital scale for this phase. Volumetric measurements are the enemy of consistency. The autolyse initiates the extensibility of the dough, making it easier to stretch later without tearing.
2. Microbial Integration
Dimple your active sourdough starter into the autolysed mass. Use your fingertips to fold the dough over itself until the starter is fully incorporated. Add the salt last to avoid inhibiting the initial yeast activity.
Pro Tip: Use a bench scraper to manage the sticky mass. This tool allows you to manipulate high-hydration dough without adding excess flour, which would ruin the hydration ratio and toughen the final Sourdough Pizza Crust.
3. Bulk Fermentation and Structural Folds
Place the dough in a transparent container. Every 30 minutes for the first two hours, perform a "stretch and fold." Reach under the dough, pull it upward until you feel resistance, and fold it over the center. Rotate the bowl and repeat four times.
Pro Tip: This process aligns the gluten strands into a cohesive web. Think of it as the rebar in a concrete slab. Without these folds, the gas bubbles will merge into large, unstable pockets that vent prematurely during the bake.
4. The Cold Proof Cold-Storage
Once the dough has increased in volume by 50%, divide it into four portions. Round them into tight balls and place them in individual oiled containers. Refrigerate for 24 to 72 hours.
Pro Tip: Cold fermentation is where the flavor profile is rendered. The bacteria produce acetic and lactic acids at a slower rate than the yeast, creating that signature piquant aroma and ensuring a superior Maillard reaction in the oven.
5. Thermal Execution
Preheat your oven with a pizza stone or steel for at least one hour at its maximum setting. Gently stretch the room-temperature dough, leaving the edges untouched to preserve the gas pockets. Top lightly and launch.
Pro Tip: Use an infrared thermometer to ensure your stone has reached at least 500 degrees Fahrenheit. The sudden "oven spring" is caused by the rapid expansion of water vapor within the dough's cellular structure.
Section B: Prep & Timing Fault-Lines:
The most common failure is "The Over-Proof." If the dough is left at room temperature for too long, the acid levels become too high, effectively dissolving the gluten network. The dough will feel like soup and refuse to hold its shape. If you suspect over-proofing, do not attempt a traditional stretch; instead, perform a "focaccia recovery" by baking it in a heavily oiled pan. Temperature control is your primary lever; if your kitchen is over 75 degrees Fahrenheit, shorten your bulk fermentation by 30%.
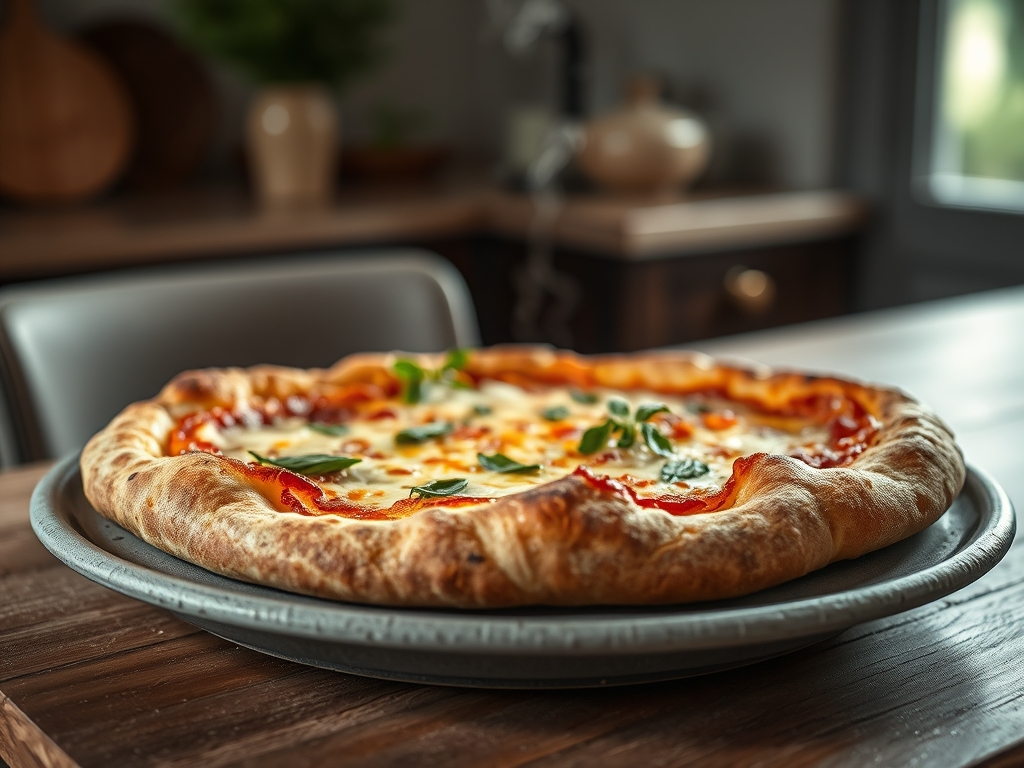
THE VISUAL SPECTRUM
Section C: Thermal & Visual Troubleshooting:
Observe the Masterclass photo: note the "leopard spotting" on the cornicione (the rim). If your crust is a uniform, dull beige, your oven temperature was too low or your dough lacked sufficient sugars from a long fermentation. To fix this, you can infuse the dough with a teaspoon of honey or malt powder to encourage browning. If the bottom is charred but the top is raw, move your stone to a higher rack. If the crust is brittle rather than chewy, you likely over-worked the dough during the shaping phase, squeezing out the precious gas you spent 48 hours cultivating. The goal is a "glass-like" exterior with a soft, moist interior.
THE DEEP DIVE
Macro Nutrition Profile:
A standard 280g dough ball provides approximately 650 calories, 130g of carbohydrates, 22g of protein, and 4g of fat. The fermentation process significantly reduces the presence of phytic acid, making the minerals in the wheat more bioavailable and the gluten easier to digest for those with mild sensitivities.
Dietary Swaps:
- Vegan: This recipe is naturally vegan. Ensure your toppings follow suit.
- Keto: Sourdough is inherently high-carb; however, you can substitute 30% of the flour with almond flour and use xantham gum for binding, though you will lose the microbial gas retention.
- GF: Use a high-quality 1:1 gluten-free flour blend and a dedicated gluten-free sourdough starter. Note that the "stretch and fold" technique will be replaced by a simple "smooth and press" method.
Meal Prep & Reheating Science:
To maintain the molecular structure when reheating, avoid the microwave. The microwave agitates water molecules, causing the starch to gelatinize and turn rubbery. Instead, use a dry skillet over medium heat to re-crisp the base, then add a teaspoon of water to the pan and cover with a lid for 30 seconds to steam the cheese and soften the crumb.
THE KITCHEN TABLE
Why is my dough snapping back when I stretch it?
The gluten is too tense. This occurs if the dough is too cold or wasn't rested long enough after balling. Let it sit at room temperature for another 45 minutes to allow the protein bonds to relax.
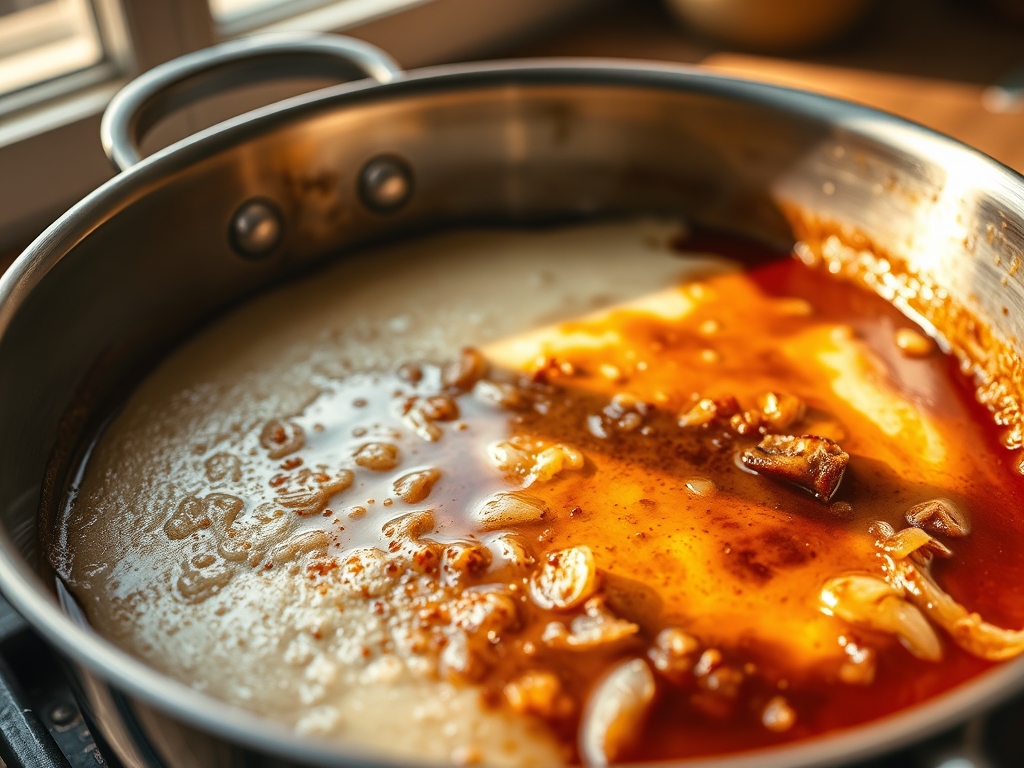
Can I use a saucier for my pizza sauce?
Absolutely. A saucier is ideal for reducing your tomato base. Its rounded bottom prevents solids from scorching in the corners, allowing you to deglaze with a splash of red wine for a deeper flavor profile.
My crust is soggy in the middle. What happened?
This is the "Soggy Bottom" syndrome. It is caused by over-topping or a stone that hasn't recovered its heat between bakes. Limit your sauce and ensure the stone is saturated with thermal energy before launching.
How do I know when bulk fermentation is done?
Use the "poke test." Gently press the dough with a floured finger. If it springs back slowly and leaves a slight indentation, it is ready. If it snaps back instantly, it needs more time to aerate.

