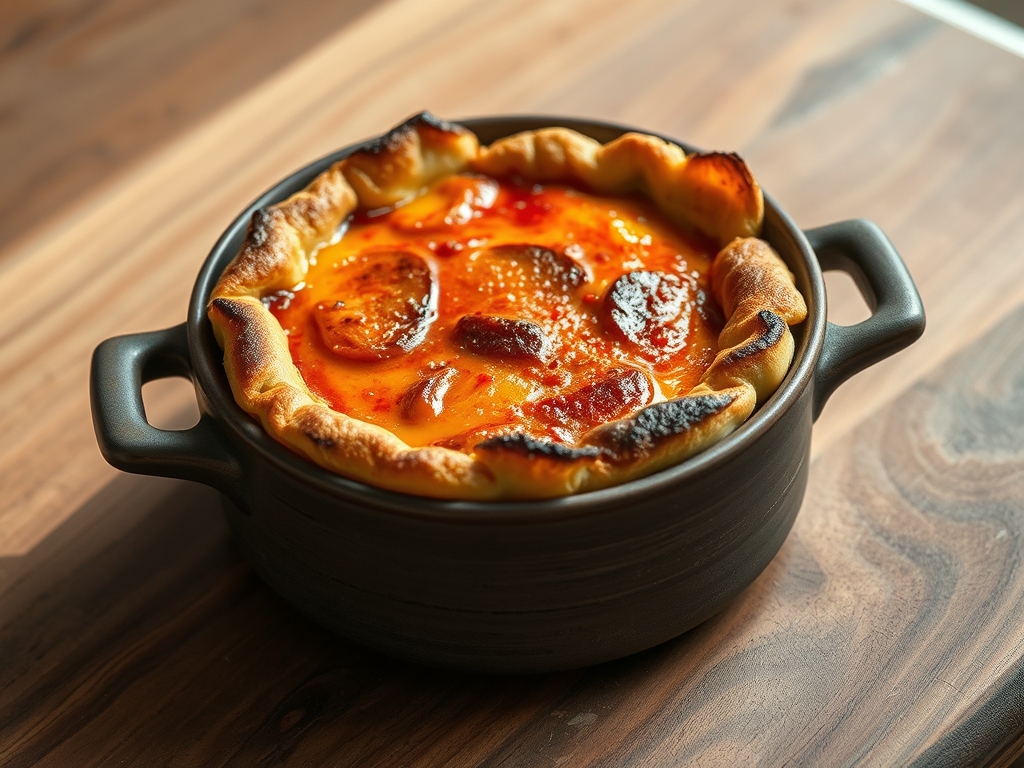
Listen to the sound of a New York Style Crust as it undergoes the ultimate structural stress test. It is a rhythmic, percussive snap that signals a perfectly dehydrated exterior, immediately followed by the silent, airy yield of a crumb that has been engineered for maximum tensile strength. This is not merely dinner; it is a high-stakes architectural feat where high-protein flour and precise hydration levels collide to create a canvas that is both foldable and formidable. We are hunting for that elusive "leopard spotting" on the undercarriage, a result of the Maillard reaction firing at peak efficiency within a high-thermal environment. The aroma is a complex chemical bouquet of fermented yeast and caramelized sugars, heavy enough to anchor a room but light enough to vanish the moment the slice hits your tongue. If your current dough lacks the structural integrity to support a heavy payload of low-moisture mozzarella without sagging into a tragic, soggy mess, your kitchen infrastructure is failing you. It is time to audit your process and recalibrate your expectations for what a true metropolitan slice can achieve.
THE DATA MATRIX
| Metric | Specification |
|---|---|
| Prep Time | 30 Minutes (Active) |
| Execution Time | 48 to 72 Hours (Cold Fermentation) |
| Yield | 4 Dough Balls (14-inch diameter) |
| Complexity (1-10) | 7 |
| Estimated Cost per Serving | $1.25 |
THE GATHERS
Ingredient Protocol:
- 800g / 6.25 cups High-Gluten Flour (13% to 14% protein content)
- 500ml / 2.1 cups Filtered Water (Chilled to 40 degrees Fahrenheit)
- 16g / 1 tbsp Fine Sea Salt
- 4g / 1 tsp Instant Dry Yeast
- 15ml / 1 tbsp Extra Virgin Olive Oil
- 10g / 2 tsp Diastatic Malt Powder (Optional for enhanced browning)
Section A: Ingredient Quality Audit:
The most common failure in a New York Style Crust is the use of standard All-Purpose flour. AP flour lacks the protein density required to build a robust gluten network, resulting in a crumbly, weak structure that cannot withstand the "New York Fold." If you find your dough tearing during the stretch, your flour is likely under-powered. Fix this by sourcing high-gluten bread flour or adding vital wheat gluten to your mix. Another critical failure point is tap water. Chlorine can inhibit yeast activity and alter the flavor profile. Use filtered water to ensure the yeast can aerate the dough effectively during the long cold-ferment. If your crust looks pale even after a long bake, your sugar levels are too low. Adding diastatic malt powder or a pinch of honey will provide the necessary fuel for the Maillard reaction, ensuring a deep, golden-brown finish.
THE MASTERCLASS
1. The Initial Hydration and Autolyse
Combine your high-gluten flour, water, and yeast in a stand mixer bowl. Mix on the lowest setting until no dry flour remains. Let the mixture rest for 20 minutes.
Pro Tip: This resting phase, known as autolyse, allows the flour to fully hydrate before salt and oil are added. This jumpstarts the enzymatic breakdown of starches into sugars, making the dough more extensible. Use a digital scale for these measurements; volumetric cups are too inconsistent for high-level baking.
2. The Structural Integration
Add the salt and olive oil to the hydrated mass. Mix on medium speed for 8 to 10 minutes until the dough is smooth, elastic, and clears the sides of the bowl.
Pro Tip: The olive oil acts as a lubricant for the gluten strands, allowing them to slide past one another without snapping. This results in a more tender bite despite the high protein content. Use a bench scraper to manage the dough on your work surface to prevent heat transfer from your hands.
3. The Cold Fermentation Protocol
Divide the dough into four equal portions. Round them into tight balls and place them in oiled, airtight containers. Refrigerate for at least 48 hours.
Pro Tip: Cold fermentation slows down yeast activity, allowing for the development of complex organic acids. This is where the "sour" and "nutty" notes of a professional New York Style Crust are born. A digital thermometer should confirm your fridge is holding steady at 37 degrees Fahrenheit to prevent over-proofing.
4. The Precision Stretch
Remove the dough from the fridge two hours before baking. On a floured surface, gently press from the center outward to create a rim, then use the backs of your knuckles to stretch the dough to a 14-inch diameter.
Pro Tip: Never use a rolling pin. A pin will collapse the delicate CO2 bubbles you worked so hard to cultivate. You want to preserve the air to ensure the crust can render its moisture quickly in the oven, creating a crisp exterior and a soft interior.
5. The High-Thermal Execution
Launch the pizza onto a preheated baking stone or steel at the highest possible oven temperature (500 to 550 degrees Fahrenheit). Bake for 7 to 10 minutes.
Pro Tip: A baking steel has higher thermal conductivity than a stone, delivering heat to the bottom of the crust faster. This rapid heat transfer causes "oven spring," where the gases expand violently to create a light, airy rim. Use a wooden pizza peel for launching and a metal peel for retrieval.
Section B: Prep & Timing Fault-Lines:
Timing is the silent killer of great pizza. If you pull your dough straight from the fridge and attempt to stretch it, the gluten will be too tight, causing it to snap back like a rubber band. This leads to an uneven, thick crust. Always allow the dough to reach room temperature. Conversely, if you leave the dough out too long, it will become over-proofed and lose its structural integrity, resulting in a flat, dense "cracker" texture. Monitor the dough; it should be supple and hold its shape when poked. If the dough feels viscous or sticky, it has fermented too long or the room is too humid.
THE VISUAL SPECTRUM
Section C: Thermal & Visual Troubleshooting:
Referencing the Masterclass photo, your crust should exhibit a distinct "leopard spotting" pattern. If your crust is a uniform, dull tan, your oven temperature is too low or your dough lacks sugar for caramelization. If the cheese is browning before the crust is set, move your baking stone to a lower rack to increase bottom-heat exposure. If the center of the pizza is soggy (the dreaded "soupy center"), you have likely used too much sauce or high-moisture fresh mozzarella. Switch to low-moisture shredded mozzarella to ensure the fat can render properly without releasing excess water. The rim should be puffed and shattered-glass crisp; if it looks dense, you likely handled the dough too roughly during the stretch, popping the internal air pockets.
THE DEEP DIVE
Macro Nutrition Profile:
A single slice of this New York Style Crust (1/8th of a 14-inch pie) contains approximately 210 calories, 4g of fat, 38g of carbohydrates, and 7g of protein. The high protein content of the flour contributes significantly to the satiety factor compared to standard commercial pizzas.
Dietary Swaps:
- Vegan: This recipe is naturally vegan. Ensure your sugar or malt sources are vegan-certified.
- Keto: Replace flour with a blend of almond flour, vital wheat gluten, and oat fiber. Note that the "stretch" will be significantly reduced.
- GF: Use a high-quality 1-to-1 gluten-free baking flour. Add 5g of xanthan gum to mimic the viscous nature of gluten, though the "fold" will be difficult to replicate.
Meal Prep & Reheating Science:
To maintain the molecular structure when reheating, avoid the microwave. The microwave agitates water molecules, turning the crust into a rubbery mess. Instead, use a dry skillet over medium heat. This re-crisps the bottom through direct conduction while the steam trapped under a lid softens the cheese and top crust without dehydrating the crumb.
THE KITCHEN TABLE
Why does my dough keep shrinking back when I stretch it?
Your gluten is likely too cold or under-rested. Ensure the dough has sat at room temperature for at least two hours. If it still resists, let it rest for another 15 minutes to allow the protein bonds to relax.
Can I use a regular baking sheet instead of a stone?
You can, but the results will be inferior. A thin baking sheet lacks the thermal mass to produce a crisp bottom. If using a sheet, preheat it upside down to create a makeshift "hot plate" for the dough.
My crust is crispy but has no flavor. What happened?
You likely skipped the cold fermentation. The 48-hour window is non-negotiable for flavor development. Without it, you are eating unfermented flour and water, which lacks the piquant, yeasty complexity of a true New York slice.
How do I get that perfect "fold" without the slice breaking?
The fold is a result of the ratio between the crisp exterior and the hydrated interior. Ensure you do not over-bake the pizza. The crust should be stiff enough to hold horizontal, but flexible enough to bend without snapping.