Listen to the roar of the flame. If your oven is not screaming at nine hundred degrees, you are not baking; you are merely warming bread. The authentic Neapolitan Pizza Crust is a violent chemical reaction disguised as dinner. It is the art of carbon dioxide trapping, where high-protein flour meets high-velocity heat to create a structural masterpiece. We are looking for the leopard spotting, those charred micro-craters that signify a perfect fermentation cycle. The crumb must be airy, almost ethereal, yet possess a pull that challenges the jaw. This is not about a flat disc of dough; it is about an architectural lattice of gluten holding onto gas for dear life. When that dough hits the stone, the moisture flashes into steam, inflating the cornicione like a high-speed airbag. If you fail to manage the hydration or the thermal mass, you end up with a dense, soggy cracker. We do not do crackers here. We build infrastructure. We engineer the crunch. We curate the blister.
THE DATA MATRIX
| Metric | Specification |
|---|---|
| Prep Time | 20 Minutes (Active) / 24-48 Hours (Fermentation) |
| Execution Time | 90 Seconds |
| Yield | 4 Dough Balls (250g each) |
| Complexity (1-10) | 8 |
| Estimated Cost per Serving | $1.25 |
THE GATHERS
Ingredient Protocol:
- 600g / 4.75 cups "00" Flour (High protein, finely milled)
- 390ml / 1.65 cups Filtered Water (Room temperature)
- 18g / 1.1 tbsp Sea Salt (Fine grain)
- 1.5g / 0.5 tsp Active Dry Yeast
- 5ml / 1 tsp Extra Virgin Olive Oil (Optional for home oven elasticity)
Section A: Ingredient Quality Audit:
Sub-par materials lead to structural collapse. If your flour has a low protein content, the gluten network will fail to aerate, resulting in a flat rim. Solution: Ensure you are using "00" flour with at least 12 percent protein. If your water is heavily chlorinated, it will inhibit yeast activity. Fix: Use filtered or spring water to protect the fermentation. If your yeast is ancient, your dough will be a lead weight. Always bloom a small portion in warm water first to check for "life" before committing to the full batch.
THE MASTERCLASS
1. The Autolyse Phase
Combine your flour and water in a large bowl until no dry clumps remain. Let this shaggy mass rest for twenty minutes. This allows the flour to fully hydrate and begins the gluten development without manual labor.
Pro Tip: Use a digital scale for this. Volumetric measurements are the enemy of consistency; five grams of flour can be the difference between a supple dough and a dry brick.
2. Yeast and Salt Integration
Sprinkle your yeast and salt over the hydrated mass. Begin folding the dough over itself, pinching and squeezing to incorporate the granules. Do not add the salt directly onto the yeast in a dry pile, as the osmotic pressure can kill the cells.
Pro Tip: Use a bench scraper to keep your workspace clean. It allows you to flip and manipulate the viscous dough without it sticking to your hands and ruining the hydration ratio.
3. The Bulk Fermentation
Place the dough in a lightly oiled container. Cover it tightly and leave it at room temperature for two hours before moving it to the refrigerator for twenty four to forty eight hours. This cold fermentation is where the flavor molecules develop.
Pro Tip: This stage is where you infuse the dough with complex esters and acids. A longer cold ferment creates a more piquant aroma and better charring during the bake.
4. Balling and Tensioning
Divide the dough into four equal portions. Tension each piece by pulling the sides toward the bottom, creating a smooth, tight skin on top. This surface tension is vital for a uniform rise.
Pro Tip: Professional pizzaiolos use a saucier or a small metal bowl to cover individual balls during the final proof. This prevents a "skin" from forming, which would crack and inhibit the oven spring.
5. The High Heat Launch
Stretch the dough by hand, never a rolling pin, to preserve the gas bubbles. Launch onto a preheated stone or steel at the highest possible temperature your equipment allows.
Pro Tip: Use an infrared thermometer to verify your stone temperature. If the stone is under five hundred degrees, you will not achieve the render of starches required for that signature blistered texture.
Section B: Prep & Timing Fault-Lines:
The most common failure is rushing the final proof. If the dough is too cold when it hits the oven, you get "dense-center syndrome." Ensure the dough balls sit at room temperature for at least two hours before stretching. If the dough snaps back when you try to stretch it, the gluten is too tight. Walk away for fifteen minutes; let the proteins relax, then resume.
THE VISUAL SPECTRUM
Section C: Thermal & Visual Troubleshooting:
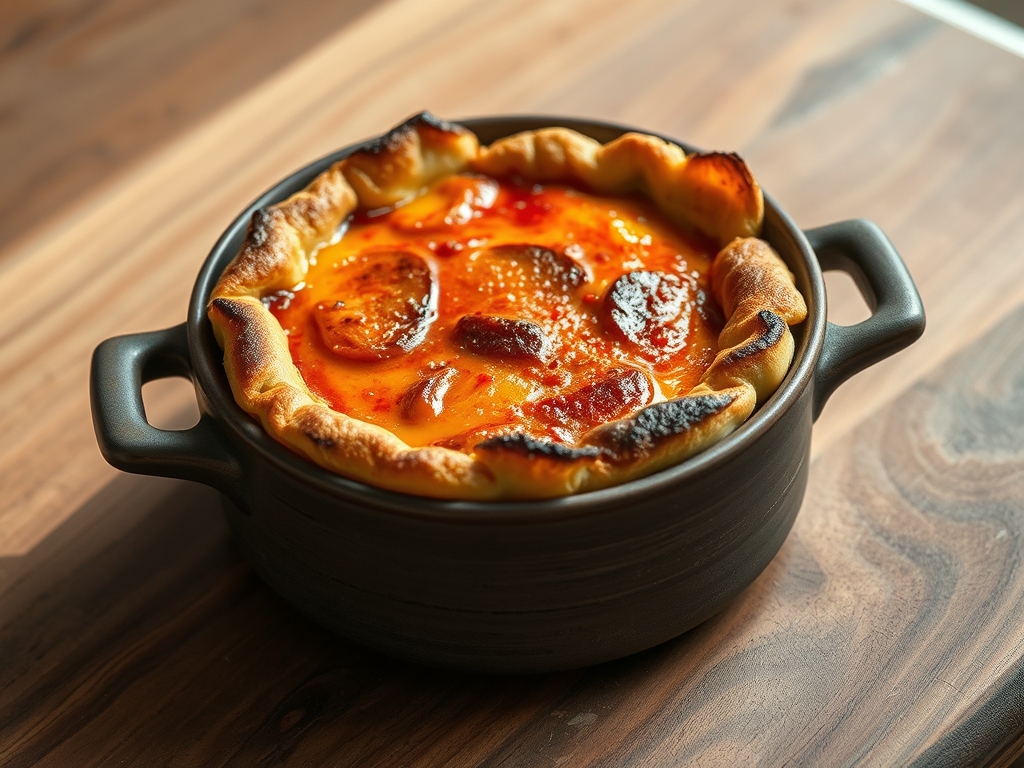
Look at the Masterclass photo above. Notice the high-contrast charring. If your crust is a uniform, pale tan, your oven is too cold or your dough lacks sugar (malt). If the crust is black but the middle is raw, your stone is too hot or the dough is too thick. To fix uneven browning, rotate the pizza every thirty seconds using a turning peel. If the crust looks dull and matte rather than vibrant, you likely over-proofed the dough, exhausting the sugars that facilitate the Maillard reaction. A perfect Neapolitan Pizza Crust should look like a topographical map of a volcanic island; rugged, dark, and full of life.
THE DEEP DIVE
Macro Nutrition Profile:
A single 250g dough ball yields approximately 580 calories, 115g carbohydrates, 18g protein, and 2g fat. The long fermentation process breaks down complex starches, making it significantly easier on the digestive system than standard "quick" breads.
Dietary Swaps:
- Vegan: This recipe is naturally vegan. Ensure your yeast source is certified.
- Keto: Replace "00" flour with a blend of vital wheat gluten, oat fiber, and almond flour. Note: You will lose the carbon dioxide trapping capability of traditional starch.
- GF: Use a high-quality gluten-free flour blend containing xanthan gum. You must add 10 percent more water to account for the increased absorption of alternative starches.
Meal Prep & Reheating Science:
To maintain the molecular structure when reheating, avoid the microwave at all costs. The microwave vibrates water molecules, turning your crust into rubber. Instead, use a dry skillet over medium heat to crisp the bottom, then add a teaspoon of water to the pan and cover with a lid for thirty seconds. The steam will re-hydrate the cheese while the pan maintains the crust's structural integrity.
THE KITCHEN TABLE
Why is my dough so sticky and impossible to handle?
High hydration is the secret to a light crust, but it requires technique. Use the "slap and fold" method to build strength without adding extra flour, which would ruin the delicate balance of the crumb.
Can I bake this in a standard home oven?
Yes, but use a baking steel. Steels transfer heat faster than stones, helping you simulate the intense environment of a wood-fired oven. Set your oven to its maximum setting and preheat for one hour.
What if I do not have forty-eight hours to wait?
You can increase the yeast to 4g and ferment at room temperature for six hours. You will lose the depth of flavor provided by the cold ferment, but the structural integrity will remain intact for a solid bake.
Why did my pizza stick to the peel during launch?
Moisture is the enemy of the launch. Ensure your peel is dusted with semolina flour, which acts like tiny ball bearings. Work quickly once the toppings are on; the longer it sits, the more it sticks.